
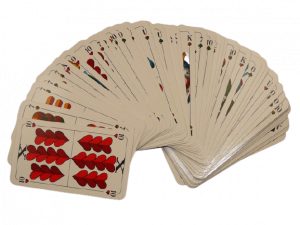
Materials: Deck of subitizing cards with quantities 0-10
How to Play:
• Deal each player 5 cards. The rest of the deck is then spread out
facedown to create a “fishpond” between the players.
• Before starting the game, all of the players put any pairs they
happen to have in their hand down and earn a point for each
pair.
• Each player gets a turn to ask another player if they have a
particular card. For example, on you turn, if you have a card with
five dots, you would ask your opponent if they also have a five
card. If they have a five, they give you the card. If they don’t have
a five, they say, “Go fish!” If you get a five from the pond, you put
the pair out in front of you. If you don’t get a five, you keep the
drawn card in your hand. Play continues until all the cards are
paired.
• Players get one point for each pair of cards. The player with the
most points wins the game.
• You can use chips or a ten frame to keep track of points. One chip
for each pair.
Variation:
- One More Than– play with a deck of cards 0-9. Players ask for a
card that is one more than a card in their hand. For example, if
you have a three card in your hand, then you ask your opponent
for a card with four. - Tens Go Fish – This game is just like regular Go Fish, but with a twist. Instead of matching pairs with the same numbers, match pairs whose sum is ten.
 What you need:
 Objective: Recognize visual speech patterns; compare numbers to determine the larger value and associate number names, quantities and written numbers.
 Let one child at a time close their eyes, shake the container near one ear, the other ear, or at the neck of the child. Ask the child to tell you where the sound came from!
It is important that the rest of the group of children is as quiet as they can when performing this experiment, otherwise it will be difficult to hear the Sound!
Is sound heard everywhere?
Sound is conducted differently in different materials. That sound is heard even under water, you learn that when you dare to have your ears below the water surface, but that phenomenon can also be detected through a plastic container.
Ask the children (one at a time) to put one ear against a wooden object, and hold the other ear shut. Tap the wooden object lightly with the pen. Can it be heard? Continue with the other materials.
The children who dare, can lower their ears below the water surface in the pool if you bathe, then you tap with the pen against the pool edge.
Let one child at a time close their eyes, shake the container near one ear, the other ear, or at the neck of the child. Ask the child to tell you where the sound came from!
It is important that the rest of the group of children is as quiet as they can when performing this experiment, otherwise it will be difficult to hear the Sound!

Is sound heard everywhere?
Sound is conducted differently in different materials. That sound is heard even under water, you learn that when you dare to have your ears below the water surface, but that phenomenon can also be detected through a plastic container.
Ask the children (one at a time) to put one ear against a wooden object, and hold the other ear shut. Tap the wooden object lightly with the pen. Can it be heard? Continue with the other materials.
The children who dare, can lower their ears below the water surface in the pool if you bathe, then you tap with the pen against the pool edge.

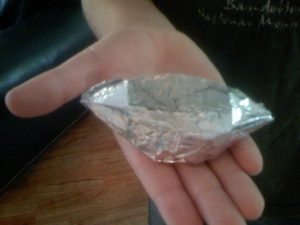 Your challenge is to build a boat that can hold the most small coins before it sinks.
 The Swedish National Agency for Education (