 Now in Easter times – why don’t try some egg experiments?
At Blue Bear Wood:s blog can you find ideas on how to dissolve egg (is Coke or orange juice worst?), or make them grow.
Mötespunkt för pedagoger att dela naturvetenskapliga idéer
 Now in Easter times – why don’t try some egg experiments?
At Blue Bear Wood:s blog can you find ideas on how to dissolve egg (is Coke or orange juice worst?), or make them grow.
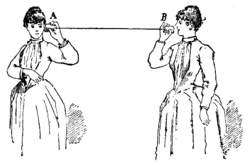 Why don’t try to make a ”can-phone” (have no idea if this is the correct term)? Many have done it sometimes.
Try to experiment with it; how long thread can you use?, what difference does the thread quality make?, can you listen around corners?…
When you’re done experimenting, let the kid use it to play with, and they’ll might find more questions to ponder…
The manual (in Swedish) is found from experimentskafferiet.se, though their site seems to be down for the moment.
 A fun and engaging lesson to introduce engineering and STEM learning in the classroom.
Student Learning Objectives: The students will be able engineering concepts to build a bridge that will hold the weight of a toy goat and record and self evaluate their designs on their digital portfolio.
Standards: K-2-ETS1-2. Develop a simple sketch, drawing, or physical model to illustrate how the shape of an object helps it function as needed to solve a given problem.
Grade Ranges: K-1
Attention Getter: The teacher will introduce the lesson by playing the NASA for kids engineering video for the class.
Direct Instruction: The teacher will announce to the class that today they are going to work as engineers. Present the Google Presentation The Three Billy Goats Gruff STEM Challenge. Pose the problem- How can the goats cross the river with the troll? (Solution- Build a bridge). Then go over the steps in the engineering process and explain the next step is Plan. TTW go over the task and the materials available. Presentation
Guided Practice: The teacher will pass out the planning sheet and have the students draw the materials and the blueprint for their bridge. The teacher will encourage students to talk with their classmate and work collaboratively to come up with a plan.
Independent Practice: Students will gather materials and begin building their bridge. When students have finished they will bring their bridge to the testing area. They will test their bridge to see if it fits over the river and can hold one toy goat. Then they will go to the recording station to record their results. Students will use the SeeSaw App to take a picture of their bridge and post it to their learning journal. Students will record how their bridge worked and what changes they think would improve their design.
Wrap Up: Students will gather on the carpet. The teacher will show SeeSaw on the bridge and allow students to share their journal entry. The students and teacher will discuss what materials and techniques worked well and what did not work well.
Attachment: Lesson plan & students worksheet: Technology Lesson Plan- STEM Three Billy Goats Gruff
Try to work together and build a tower. It’s understanind of mechanics and demands a whole lot of cooperation.
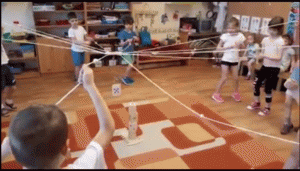 See link for a clip on how it works: Link
Taken from Bodil Johansson ’s blog
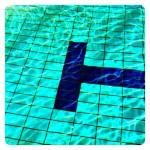
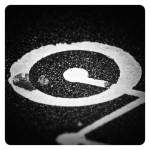
Have you thought on that the selection at the end of a swimming pool looks like a T or that a round pot from above becomes an O or that from a certain angle the cycle path marking becomes a Q? All you need is to look closer, change directions and suddenly you see the letter.
This is an exercise that is about learning to see the motives and how you, by thinking about the image composition, that is, how the different parts of the picture are connected, bring out the message of the image.
In addition to training in recognizing and naming letters, it can be an introduction to photography that will then give inspiration to more.

For best results, the temperature should preferably be below or below 6 degrees Celsius. It is possible to freeze bubbles even in milder weather, but it is more difficult and takes longer.
It is also best to perform the experiment when it is windless so that the bubbles do not burst or blow away before they land and can freeze.
How to Shoot the Bubbles:

Science doesn’t have to be hard. Here’s a nice example to prove that:
It’s 2017 teacher of the year in Washington, Camille Jones, that discusses an engineering lesson with Bill Gates.
There are millions of smart containers called geocaches hidden in almost every country on earth, just waiting to be found. There are probably some close to you right now.
If you want to try, you can try either Geocaching, a slightly simpler app in the free version or Cachly, a slightly more advanced app for some euros.
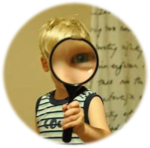 Are you out in the forest and want to look closer on something. Try to use an magnifying app on your Ipad. With eMagnifier can you even save photos from what you looked at.