Make Your Own Paper Kite

Materials:

  • Printing paper
  • Scissors
  • Yarn (This worked well for me, but I wish I had used a lighter string.)
  • Tape
  • Popsicle stick
  • Markers
  • Hole punch
  • Stapler
  • Ruler

Instructions

  1. Draw a pattern on both sides of the paper.
  2. Fold the paper in half. (Half the length.)
  3. Using your ruler, make a mark at 6.5 cm and a mark at 9 cm on the folded edge.
  4. Now bend both corners of your paper downwards and staple them together at the 6.5 cm mark. (Don’t fold them down, make sure the paper is curved.) Your kite should now look like this.
  5. Punch a hole at the 9 cm mark. Then cut a long piece of string and tie it to your kite.
  6. Tape the other end of your string to a popsicle stick. Wrap your excess string around the popsicle stick so it doesn’t tangle.

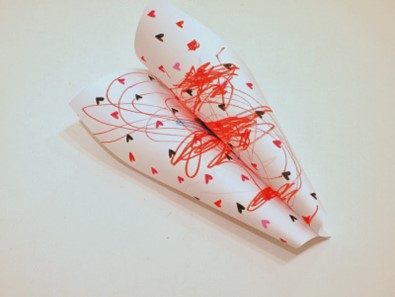
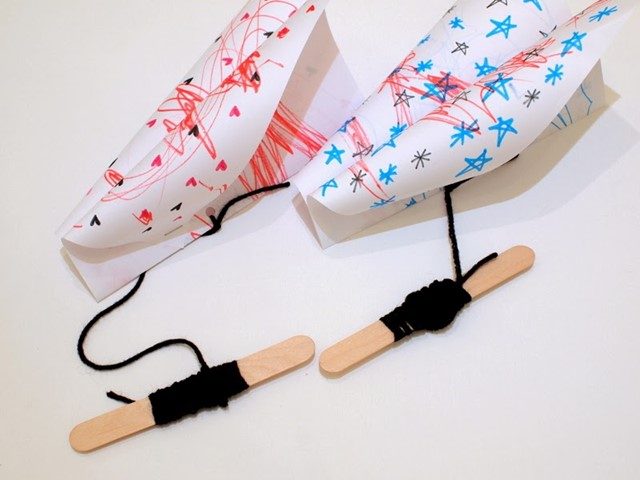
Now you can go out and fly your homemade kite!    It takes a strong gust of wind to lift your kite, but if you run around (or ride your bike really fast) your kite will also float next to you.

Gör en egen pappersdrake

Material:

  • Skrivpapper
  • Sax
  • Garn (Detta fungerade bra för mig, men jag önskar att jag hade använt ett lättare snöre.)
  • Tejp
  • Glasspinne
  • Tuschpennor
  • Hålslag
  • Häftapparat
  • Linjal

Instruktioner

  1. Rita ett mönster på båda sidor av pappret.
  2. Vik pappret på mitten. (Halva längden.)
  3. Med hjälp av din linjal gör du ett märke vid 6,5 cm och ett märke vid 9 cm på den vikta kanten.
  4. Böj nu båda hörnen på ditt papper nedåt och häfta ihop dem vid 6,5 cm märket. (Vik inte ner dem, se till att pappret är böjt.) Din drake ska nu se ut så här.

  1. Stansa ett hål vid 9 cm markeringen. Klipp sedan en lång bit snöre och knyt den till din drake.
  2. Tejpa fast den andra änden av ditt snöre på en glasspinne. Linda ditt överflödiga snöre runt glasspinnen så att det inte trasslar ihop sig.

Nu kan du gå ut och flyga med din egengjorda drake!    Det krävs en kraftig vindpust för att lyfta din drake, men om du springer runt (eller cyklar riktigt fort) kommer din drake också att flyta bredvid dig.

Friktionsexperiment för leksaksbilar

Enkla fysik-aktiviteter som detta friktionsexperiment är ett underbart sätt att få barn att tänka, utforska, lösa problem och observera vad som händer runt dem. Allt du behöver är några enkla ramper, material med olika ytor och leksaksbilar.

Utöka aktiviteten genom att tillämpa den vetenskapliga metoden: låt barnen göra förutsägelser om vilken yta som blir snabbare eller långsammare, mäta den med ett stoppur och dra slutsatser.

Tips för att utforska ramper (lutande plan)

Låt barnen utforska den enkla rampen som de vill. De kommer att vara superglada över att spela att det ofta är bäst att låta dem utforska aktiviteten fritt lite först.

Du kan också testa vinklar vid denna tidpunkt. Ändra rampens placering och testa vilka rampvinklar som är snabbare eller långsammare.

Vilka leksaksbilar rör sig snabbare? Tyngre, lättare, längre eller kortare bilar rör sig i olika hastigheter. Detta är ett bra sätt att få dem att tänka på hur saker rör sig.

Du kanske vill dela upp den här aktiviteten i två inlärningstider eftersom det är jättekul att utforska ramperna eller lutande plan och är en fysiklektion i sig.

När barnen är redo, gå vidare till dina olika ramp ytor. Låt barnen känna texturerna och beskriva dem för dig. Det kan vara en bra tid att introducera termen friktion.

Vad är friktion?

Friktion är motståndet ett föremål möter när man rör sig över en annan yta. Materialen du fäste på ramperna ändrade rampens yta. De olika bilarna kommer att uppleva olika mängder friktion när de går ner dessa ramper vilket gör att bilarna påskyndar eller saktar ner.

Friktionsexperiment för leksaksbilar

Material:

  • Material för att göra ramper. Du kan använda kartong eller träplankor.
  • Leksaksbilar
  • Olika material för att skapa friktion. Handdukar, sandpapper, gummimattor, folie, bakplåtspapper, matt-bitar eller till och med lera.
  • Tejpa fast materialet vid behov så att de inte glider av ramperna.
  • Stoppur och måttband. Dessa är valfria men ett roligt sätt att utöka aktiviteten och uppmuntra till att göra förutsägelser.

Instruktioner:

  1. Välj antal och typ av material du vill testa och hur många ramper du vill ha tillgängliga.
  2. Lämna en ramp fri från material som en testramp. Säkra dina material till de andra ramperna efter behov.
  3. Ställ in dina ramper i en lutning från samma höjd. Vi använde trappor, men du kan också stapla böcker.
  4. Samla dina bilar och barn.

Ställ massor av frågor. Innan de testar bilarna, låt barnen gissa vilken textur som kan sakta ner bilen eller påskynda den när den går nerför rampen. Gör förutsägelser om vilka bilar som kommer att gå snabbare eller långsammare.

Låt barnen köra bilar nerför de olika ramperna. Om det behövs kan du använda ett måttband för att se hur långt bilarna färdas från rampen.

Vilken bil går längst? Vilken bil är långsammast? Vilken bil kraschar, faller av rampen eller klarar sig inte till slutet?

Toy Car Friction Experiment

Simple physics activities like this toy car friction experiment are a wonderful way to get kids thinking, exploring, problem solving, and observing what is happening around them.

All you need are some simple ramps, textured materials, and toy cars, and you are ready to go.

Extend the activity by applying the scientific method: get the kids to make predictions about which surface will be faster or slower, measure it with a stopwatch and make conclusions.

Tips For Exploring Ramps (Incline Planes)

Allow the kids to explore the bare ramp as they wish. They are going to be super excited to play that it is often best to let them explore the activity freely for a bit first.

You can also test out angles at this point. Change the position of the ramp and test out which ramp angles are faster or slower.

Which toy cars move faster? Heavier, lighter, longer, or shorter cars move at different speeds. This is a great way to get them thinking about the way things move.

Note: You may want to split this activity into two learning times since exploring the ramps or inclined planes is great fun and is a physics lesson in itself.

When the kids are ready, move on to your textured ramps. Let the kids feel the textures and describe them to you. This is a great time to introduce the term friction if you would like.

What Is Friction?

Friction is the resistance an object meets when moving over another surface. The materials you attached to the ramps changed the surface of the ramp. The different cars will experience different amounts of friction when going down these ramps causing the cars to speed up or slow down.

Toy Car Friction Experiment

Supplies:

  • Materials to make ramps. You can use cardboard or wood planks.
  • Toy cars
  • Variety of textured materials to create friction. Hand towels, sandpaper, rubber grippy mats, tin foil, parchment paper, a piece of rug, or even dirt.
  • Tape to secure materials if necessary so they do not slip off the ramps.
  • Stopwatch and measuring tape. These are optional but a fun way to extend the activity and encourage making predictions.

Instructions:

  1. Choose the number and type of materials you want to test, and how many ramps you want to have available.
  2. Leave one ramp free of materials as a test ramp. Secure your materials to the other ramps as needed.
  3. Set up your ramps on an incline from same height. We used stairs, but you can also stack books.
  4. Gather your cars and kids.

Ask lots of questions. Before they test out the cars, have the kids guess which texture might slow down the car or speed it up as it goes down the ramp. Make predictions on which cars will go faster or slower.

Let the kids race cars down the different ramps. If appropriate, you can use a measuring tape to see how far the cars travel off the ramp.

Which car goes the farthest? Which car is the slowest? Which car crashes, falls off the ramp, or doesn’t make it to the end?

Experiment found from LittleBinSForLittleHands

Create a QR Map

Use a regular wall map to display digital photos, perhaps photos of where the children live, their rooms or the like.

The procedure will then be:

  1. Get a wall map.
  2. Send home an iPad, or similar with the children and let them (or the guardians) take photos of the house they live in, their room, a stuffed animal or the like.
  3. Save your pictures to OneDrive.
  4. Create a link to each image.
  5. Create QR code, for example on QRcodeMonkey.
  6. Put a needle where the child lives and pull a thread from there to the QR code.


The result could be something like this:

(The QR code shows where my desktop is located.)

Skapa en QR-karta

Använd en vanlig väggkarta att visa digitala bilder, kanske foton av var barnen bor, deras rum eller liknande.

Proceduren blir då:

  1. Skaffa en väggkarta.
  2. Skicka hem en iPad, eller liknande med barnen och låt dem (eller vårdnadshavarna) ta foton av huset de bor i, deras rum, ett gosedjur eller liknande.
  3. Spara bilderna på OneDrive.
  4. Skapa länk till varje bild.
  5. Skapa QR-kod, exempelvis på QRcodeMonkey.
  6. Sätt en nål där barnet bor och dra en tråd därifrån till QR-koden.

För exakta instruktioner för att ladda upp till OneDrive och skapa QR-kod se manualen QR koder och OneDrive.

Resultatet kan bli något som det här:
(QR-koden visar var mitt skrivbord finns.)