Trafiksskyddet har en sida för att arbeta med säkerhet I trafiken: Trafikpuppe
Författare: Björn Bergvall
MAPPA materialipankki
Heurekas Experimentfabrik
En sida med instruktioner till ett flertal skojiga experiment som har testats på Heureka.
How much can a magnet carry?
Make your own magnet
How strong is your magnet?
Hur mycket kan en magnet lyfta?
Ett experiment som innehåller både naturvetenskap och praktisk matematik. Alex räk nade till 137 spikar som satt fast på magneten och hade säkert kunnat räkna längre om inte spikarna i lådan hade tagit slut. Kan alla magneter hålla lika många saker, eller skiljer det sig, och i så fall varför? Något att undersöka!
Om ni vill kan ni börja med att:
Göra en egen magnet
Tag en magnet och stryk en nål flera gånger (cirka 20 gånger behövs) efter änden på magneten, men hela tiden åt samma håll, inte fram och tillbaka. Prova att plocka upp något av metall med stickan/nålen. Fungerar det? Då har du gjort en magnet som vänder sig så den har nordändan mot den magnetiska sydpolen och sydändan mot den magnetiska nordpolen.
Genom att dra med magneten mot nålen vrider sig många av järnatomerna i nålen så deras magnetfält börjar samverka. Detta gör att nålen börjar fungera som en magnet.
Hur stark är din magnet?
- Vad kan den dra?
- Hur mycket kan den lyfta?
- Hur många tågvagnar kan magneten hålla samtidigt i en lång kedja, innan kedjan bryts?
- Kan den få metallföremål att hoppa upp från bordet?
- Hur högt i så fall?
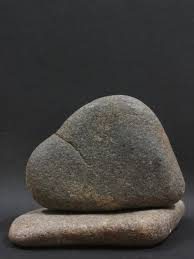
Hide the stone – with clues
Stimulate and challenge children in their mathematical development. Work with the mathematical area of locating by having children encounter different concepts and being challenged in formulating and listening to different concepts that indicate location.

Procedure:
• The hider of the stone goes away and finds a good hiding place for the stone. When the stone is hidden, the hider goes to the other participants and gives them a clue, for example that the stone is under something high beside some brown.
• The participants must now observe the surroundings and try to find the stone.
• If more clues are needed, all participants are reassembled and the hider gives more descriptions, for example that the stone is below something high that is brown and green, next to something long and brown, rather than something narrow and green.
• Participants continue to search. When the stone is found, the participant who found the stone may hide it.
As an adult, it is important to support both the hider and the explorer in formulating and interpreting the concepts used.
Gömma stenen – med ledtrådar
Stimulera och utmana barnen i sin matematiska utveckling. Arbeta med det matematiska området lokalisera, genom att barnen möter olika begrepp och utmanas i att formulera och lyssna på skilda begrepp som anger läge.

Tillvägagångssätt:
- Gömmaren av stenen går iväg och hittar ett bra gömställe för stenen. När stenen är gömd går gömmaren till de övriga deltagarna och ger dem en ledtråd, till exempel att stenen ligger under något högt bredvid något brunt.
- Deltagarna måste nu iaktta omgivningen och försöka hitta stenen.
- Behövs fler ledtrådar samlas alla deltagare igen och gömmaren får ge fler beskrivningar, till exempel att stenen ligger under något högt som är brunt och grönt, bredvid något långt och brunt, framför något smalt och grönt.
- Deltagarna fortsätter att leta. När stenen är hittad får den deltagare som hittade stenen gömma den.
Som vuxen är det viktigt att stötta både gömmaren och letarna med att formulera och tolka de begrepp som används.
Make a Balloon powered car
Maybe not to sooth down a group of children, but a lot of fun will be included in this: Make a Balloon powered car
Don’t forget to reason together afterwards of why things are happening.
Gör en ballongbil
Kanske inte vad som lugnar ner en barngrupp, men mycket kul kan man ha med det här: Bygg din ballongbil
Glöm inte bort sedan att fundera på vad som händer
Medforskande
Lite inspiration för naturvetenskap så här en måndag morgon (eller när du nu läser det):
Varsågod säger jag och skolverket i Sverige bjuder: https://youtu.be/knsnCO9Nsbk

 An experiment that contains both science and practical mathematics. Alex counted for 137 nails that stuck to the magnet and could certainly have counted longer if the nails in the box had not run out. Can all magnets hold the same number of things, or does it differ, and if so, why? Something to look into!