Supplies
- Shallow dish (we used a pie plate)
- Small dish (just big enough to hold some dish soap)
- Q-Tip cotton swab
- Milk (try a variety of different fat content milks and creams to see how it affects your reactions)
- Dish Soap (we used Dawn)
- Food Colouring (ensure it is liquid food colouring, gel food coloring will not work)
Directions
Fill your dish with milk until is it about 1 – 2 cm deep.
Add some dish soap to your small dish and set it to the side.
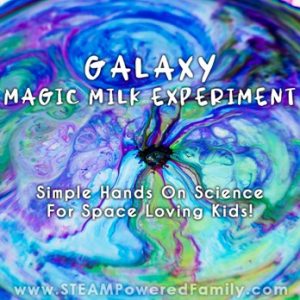
Next add drops of food colouring around the plate. We used a variety of blues, a purple and a drop of yellow (to make stars and make it more like pictures of nebulas we have seen). We find it best to do this in random circle like patterns around the centre point.
Now it’s time for the big reaction!
Dip the Q-Tip into the dish soap. Then place it into the centre of the dish and watch the reaction! You can remove the Q-Tip after a couple of seconds so you can enjoy the explosions of colours.
As the reaction continues you can add more dish soap or more food colouring.
Which Kinds of Milk are Perfect?
As we learned with our previous Magic Milk study, the answer to this question depends on the reaction you want to see. At first we tried this experiment with 2% milk, but the reaction was very rapid and didn’t last as long. So the second time we added a bit of cream. We didn’t want to only use cream because we knew that would result in fractals and we wouldn’t get the spread of colour we were looking for to create our Galaxy inspired look. Adding just a bit of cream was perfect and gave us some really cool colour spreads. Whole milk gave a similar result.
Ready to learn more about the science behind Magic Milk and how the fat content of milk affects the results? Let’s dig in!
The Science Behind a Milk and Dish Soap Reaction
With our Magic Milk Science Fair Project we were able to study the effect fat content had on the movement of colour when a drop of dish soap is added. Keep in mind that milk is made up of minerals, proteins and fats. Proteins and fats are susceptible to changes, as we see in this reaction.
Surface Tension
Liquids have something called surface tension. Water, milk, and cream are made up of molecules that have positive and negative charges on their surface. Just like magnets these charges allow them to attract and repel other molecules. When milk or cream is by itself, it’s molecules are surrounded by the same type of molecules, creating a nicely balanced push and pull. The exception is the top which is exposed to air which pushes down on the liquid, creating surface tension on the top of the liquid. This surface tension of the milk affects our explosion of color.
Surfactant
There is a substance that affects a liquid’s surface tension, it’s called a surfactant. Dish soap is mostly comprised of surfactants. It has a hydrophilic part that is attracted to the water and a hydrophobic part that wants to interact with the fat molecules and repels water.
The pushing and pulling of the fat and water molecules in the milk separates them, resulting in a decrease of the surface tension.
Impact of Ratios
We see a big difference between our various fat content milks due to the different ratios of fat to water in the liquids. The higher fat content milk is much thicker. We can see this before adding the dish soap if we just look at the food colouring drops. The food colouring spreads significantly in 2%, spreads a little in 18% and doesn’t move at all in 33%.
This means, in our 33% cream, there is less water for the hydrophilic part to attract, and way too much fat for the hydrophobic part to ineract with. The surfactant (dish soap), has very limited effect on the surface tension, which remains quite a viscous, stable liquid. This leads to the fractal style, very limited spread of colour we see in the high fat milk.
In the 2% milk we have lots of water and some fat, allowing the surface tension to be affected easily. This results in a dramatic dance of color but it doesn’t last as long.
The idea is taken from SteamPoweredFamily.com