Mer information om detta, och referenser till orginalartiklar hittar ni på Skolverkets sida kring Natur, teknik och språkutveckling.
Naturvetenskapsverb
Sofie Areljung, Örebro universitet
För att naturvetenskapsundervisning ska passa i förskolan är det viktigt att barnen kan bidra med sina idéer och erfarenheter till den kunskap som skapas. Det är också viktigt att undervisningen bygger på händelser i vardagen.
Jag har många gånger sett små barn fascineras av kylskåpsmagneter. Med hjälp av en vuxen, eller på egen hand, verkar de kunna dröja länge vid att försöka få magneterna att sitta fast på en kylskåpsdörr. Barnen kommer snart på att de kan släppa magneten när den vidrör kylskåpet. Ibland trillar magneten ner och ibland fastnar den. Om magneten trillar ner försöker barnen ofta plocka upp den igen. Sedan vill de pröva samma sak om och om igen.
Som förskollärare kan man se på en sådan situation på flera sätt. Jag vill påstå att det mer traditionella sättet är att fokusera på tingen, substantiven, alltså på magneten och kylskåpet. Ett annat sätt att se på situationen är att fokusera på verbet fastna. Fastna pekar på ett naturvetenskapligt fenomen, det som händer mellan magneten och kylskåpet. Fastna är något speciellt, för magneter kan bara fastna på vissa material och bara om vi vänder en viss sida av magneten mot materialet. Verbet fastna hjälper oss även att urskilja andra naturvetenskapliga fenomen i vår omvärld: kardborren på skon eller vinteroverallen, att blöta löv fastnar på stövlarna men inte torra löv och att hårstrån fastnar på tröjan. Här har förskolläraren ett startskott för praktiska undersökningar, exempelvis: Fastnar hårstrån på alla kläder? Fastnar olika hårstrån på tröjan? Sitter hårstrået fast även om vi vänder tröjan upp-och-ner? Fastna är ett i raden av verb som kan hjälpa oss att få syn på naturvetenskapliga fenomen i vår omvärld.
Listor för fysik-, kemi- och biologiverb
Substantiv är en ordklass som täcker in konkreta föremål, varelser och platser, medan ordklassen verb täcker in skeenden, processer och handlingar
En aktivitet i tema Vatten kan handla om att is och snö blir till vatten om man tar in det inomhus, eller att vatten kan bli till is om man ställer det i frysen. Då ligger fokus vanligtvis på vatten eller is, alltså substantiven. Men vad händer om vi i stället fokuserar på verben smälta och frysa? Vår tanke var att verben hjälper en att fokusera på det naturvetenskapliga fenomenet att ämnen övergår mellan flytande och fast form, beroende på temperatur. Om smälta och frysa är i fokus behöver det inte bara röra vatten och is utan vi kan undersöka andra saker som kan smälta, till exempel glass, choklad och smör. Vi kan också fundera på vilka fasta ämnen som vi aldrig sett smälta, som sten eller metall.
Verben hjälpte oss att se världen omkring oss på ett lite annorlunda sätt och vi tänkte att de kunde hjälpa förskollärare och barn att få syn på kemiska processer och fysikaliska fenomen i förskolans vardag.
Verb och substantiv i barnets värld
Över lag visar forskningen att det är enklare för små barn att lära sig substantiv än att lära sig verb. Substantiv ofta kan kopplas till föremål med tydliga yttre gränser, medan barn sällan upplever gränser mellan enstaka handlingar i en situation. Ett exempel kan vara ett barn som gungar. En förskollärare sätter i gång rörelsen genom att dra gungan bakåt och sedan släppa den. Förskolläraren knuffar sedan med jämna mellanrum på gungan och barnet hjälper till att hålla farten genom att luta överkroppen ömsom framåt, ömsom bakåt och gungan ses pendla fram och tillbaka. I en sådan situation kan barnet, förskolläraren, gungan och gungställningen (substantiven) framstå som tydligt avgränsade. Däremot kan handlingarna dra, släppa, knuffa, luta och pendla (verben) vara svåra att urskilja från den övergripande händelsen att gunga.
Att utgå från verb i naturvetenskapligt undersökande
En skillnad mellan verb och substantiv ligger i hur barn kan erfara det som orden står för. Många substantiv står för ting, växter eller levande varelser som barnen kan röra vid. Verb å andra sidan står ofta för sådant som barnen själva kan vara med om, utföra eller få att hända. Denna egenskap hos verben kan man som förskollärare använda sig av för att planera praktiska undersökningar.
Att undersöka med den egna kroppen
Ett sätt att undersöka fysikaliska fenomen kan vara att ge barnen tillfälle att uppleva hur det känns i kroppen att rulla, snurra, balansera, glida eller halka. Förskolan Uven har arbetat med verbet rulla under ett helt läsår. En återkommande aktivitet var att rulla ute på ett öppet fält, som delvis lutade. Barnen rullade nedåt, sidledes, snabbt och långsamt. Några barn prövade att rulla varandra och märkte att det kändes mycket jobbigare att rulla någon uppför. Barnen hjälptes åt med att rulla en av förskollärarna och märkte att det lät konstigt när hon rullade. Vänta nu? Aha, det var för att nycklarna i förskollärarens jackficka skramlade i rullet. Några av barnen ville göra ett ”kompis-rull”, vilket innebar att rulla bredvid varandra hela vägen nedför sluttningen. De upptäckte snart att de rullat snett och hamnat en lång bit ifrån varandra. Vad kunde det bero på? undrade barnen och förskollärarna. Kan det bero på hur vi ser ut? Ofta hjälper vi till mycket med benen när vi rullar och därför rullar underkroppen mer än överkroppen vilket gör att vi drar åt något håll i stället för att rulla rakt nedåt. När vintern kom kunde barnen rulla på olika sorters snö och se sina rullspår i snön. De uppmärksammade även hur det lät när de rullade. Det kan låta och kännas väldigt olika att rulla på kramsnö jämfört med att rulla på nyfallen snö eller skare.
Genom dessa aktiviteter kunde barnen själva uppleva hur gravitationen, lutningen och underlaget hade betydelse för hur de rullade; om de rullade snabbt, snett eller om det helt enkelt inte gick. Det kändes utanpå kroppen, det kan exempelvis göra lite ont att rulla på hårda och ojämna underlag, jämfört med att rulla på mjuk snö. Alla ni som har rullat vet också att det känns inuti kroppen, då huvudet känns snurrigt och det kan kännas som om organen i magen har snurrat runt några varv. Om man rullat på något tyg eller på golvet kan man också känna hur håret blivit statiskt och står ut från huvudet för att laddningar flyttats mellan håret och materialet.
Att undersöka olika föremål
Alla verb kan inte upplevas med den egna kroppen, men barnen kan se till så att andra ting flyger, rinner, blandas, fastnar, smälter och så vidare. Om vi återknyter till Förskolan Uvens arbete med rulla fick barnen bland annat i uppgift att hitta fyra saker som rullar och fyra saker som inte rullar. Barnen gick omkring på förskolan och prövade olika saker och fotade sedan sina fyra rullande och fyra icke-rullande saker med en surfplatta. Med hjälp av en app kunde de sätta ihop bilderna i ett collage, som sedan fungerade som utgångspunkt för samtal. Barnen kommenterade utifrån sina bilder att saker som inte rullar – så som plastbackar, bord, stolar och klossar – är fyrkantiga eller platta.
”Kan du hitta fyra saker som inte rullar?” är exempel på en fråga som leder till ett undersökande. För att besvara frågan måste barnen leta efter föremål och pröva deras rullförmåga. Det är exempel på en produktiv fråga, alltså en som inspirerar till att söka svar. Exempel på andra produktiva frågor är sådana som riktar uppmärksamheten mot något (Har du sett? Vad är det här?), sådana som leder till noggrant jämförande, sådana som ger upphov till försök (Vad händer om …?) och sådana som inspirerar till att lösa problem.
I samband med rulla-projektet ställde Uvens personal flera frågor som kan kategoriseras, till exempel:
- Vad kan rulla? (inspirerar till försök)
- Rullar olika saker olika fort? I så fall, varför? (inspirerar till jämförande)
- Rullar saker olika långt? I så fall, varför? (inspirerar till jämförande)
- Kan vi få något att rulla uppför? (inspirerar till att lösa problem)
Behov av nya naturvetenskapliga begrepp
Den förskollärare som vill planera för praktiskt undersökande kan i stora drag utgå från frågan: ”Vad har betydelse för om eller hur någonting rullar/blandas/fastnar/smälter/ (valfritt verb)?” Ett exempel är att barnen, tillsammans med förskolläraren, ser att det som har betydelse för om något smälter är vilket ämne det rör sig om (smör, sten, is, choklad), i vilken behållare det ligger och hur varmt det är runt omkring. Vilken isbit smälter först – den som är inlindad i tyg, den som är omgiven av frigolit eller den som ligger helt fritt? Då kan det uppkomma behov av begrepp som: fast form, flytande form, isolering och temperatur. Beroende på vilka undersökningar barnen gör kan de komma på olika faktorer som har betydelse. För att kunna beskriva de olika undersökningarna rörande rulla behövde förskolan Uvens personal och barn begrepp som friktion, tyngdkraft, form, längd och hastighet. Om ni utgår från andra naturvetenskapsverb uppkommer behov av andra begrepp som beskriver vad som är typiskt för den kemiska process eller det fysikaliska fenomen som verbet handlar om. Några sådana exempel är:
- Balansera/välta – tyngdpunkt, gravitation, stödyta
- Halka – friktion
- Blanda – koncentration, späda, slamma, lösa upp
Att skilja verb åt
I barnens verblärande ingår att börja dela upp ett verb i flera. Ett exempel är verbet åka, som kan stå för många olika sätt att färdas. Eriksgårdens förskola i Bollebygds kommun har arbetat med projektet ”Det rullar och glider” och bland annat undersökt hur en sten och en leksaksbil rör sig nedför en lutande planka. På så vis kunde de få syn på att det handlade om olika typer av rörelser. Från att barnen tidigare sagt att både bilen och stenen åker nedför plankan, skilde barnen mellan att bilen rullar och stenen glider nedför plankan. Arbetslaget såg också att barnen, genom projektet, fått en ökad förståelse för hur föremåls form spelade roll för huruvida de gled eller rullade över en yta. I verblärandet ingår också att skilja liknande verb åt. Vad är exempelvis skillnaden mellan att rulla och att snurra?
Att arbeta med de yngsta barnen
Verb kan delas upp i handlingar som ger resultat och sådana som inte ger resultat. Forskning har visat att små barn föredrar att utföra sådana handlingar som ger resultat. I förskolans vardag kan det exempelvis handla om att trycka på en knapp så att ljuset tänds och släcks eller att stampa på en ishinna på en vattenpöl så att den spricker. När barnen själva kan genomföra handlingen och producera resultat framstår ofta själva handlingen, och det verb som kan kopplas till handlingen, tydligt för dem, i jämförelse med handlingar som inte ger resultat.
På Uvens småbarnsavdelning valde personalen att utgå från verbet låta i arbetet med naturvetenskap. De hade nämligen märkt att barnen intresserade sig för att banka på bordet, väggarna och annat som de kunde komma åt. Man kan säga att barnen utförde handlingar som gav resultat i form av olika ljud. Förut, berättade personalen, hade de ofta upplevt ljuden som tröttsamma och hyssjat barnen, men under arbetet med låta-temat började de i stället ställa produktiva frågor som ”Hur låter det om du bankar på golvet i stället för på torkskåpet?”. På så vis kunde de guida barnen till att uppmärksamma skillnader och likheter mellan olika material.
Personalen ställde i ordning olika platser på avdelningen, där barnen kunde utforska ljud. De tillverkade exempelvis en ”ljudmobil” och en ”ljudvägg” av wellpapp och annat material som lät när barnen strök över dem med handen. Andra exempel var hushållsrullar och rör som barnen kunde hålla mot munnen och göra ljud genom. Arbetslaget samlade ihop massor med ljud som barnen uppmärksammat i vardagen under arbetet med låta-temat: banka med rostfria skålar i en bänk, köra en bil på Duplo-plattor, slå med vispen på en kastrull, slå klossar mot varandra och hälla ut material.
Olika fokus – olika frågor
I tabell 1 har jag gett exempel på fler temaområden där substantiv- respektive verbfokus kan ge upphov till olika typer av undersökande.
| Tema | Naturvetenskapligt innehåll | Frågor som leder till undersökande | Förslag på undersöknings- och dokumentationsmetoder |
| Biologi: skogen | Substantiv: träd, svamp, mossa, spindlar | Vad finns det för skillnader och likheter mellan kam- och husmossa? …eller mellan björk och asp? | Studera bilder och texter i böcker.
Observera med lupp, känsel, lukt. Dokumentera med foto samt penna och papper |
| Verb: leva, växa,
vissna, förmultna |
Vad behövs för att en växt ska överleva? Hur förändras en svamp i mellan tre tillfällen under hösten? | Plantera växter i klassrummet och pröva hur olika faktorer (vatten, placering ljust/mörkt, kärl) har betydelse för dess överlevnad Studera en svamp på skolgården. Dokumentera förändringen med foto samt penna och papper | |
| Kemi: jäsa | Substantiv:
jästsvampar, vatten, socker, luft(gas) |
Vad är det som är speciellt med jästsvampen? | Observera noga med syn, känsel, lukt. Beskriv i text och bild Studera och rita av mikroskopbilder (i böcker eller på nätet) av jästsvampar |
| Verb: jäsa, blanda, blåsa (upp) | Vad händer när vi blandar socker, jäst och vatten? Kan vi göra blandningar som jäser olika mycket? | Egna försök i klassrummet: prova olika proportioner i blandningarna och se vilka som växer mest – eller vilka som gör att mest gas utvecklas
Observera med syn, känsel, lukt. Dokumentera med foto samt med penna och papper |
|
| Fysik:
flyga/sväva |
Substantiv: flygplan, helikopter, fåglar, fallskärm, löv, papper, luft | Vad är det för likhet och skillnad mellan ett flygplan och en fågel? | Samtala utifrån filmer, bilder och/eller modeller av fåglar och flygplan
Beskriv i text och bild |
| Verb: flyga, sväva, falla
|
Hur kan vi få ett pappersplan att flyga så långt som möjligt? Hur kan vi få ett papper att sväva så länge som möjligt? | Eget försök i klassrummet: prova olika typer av flygplan eller pappersbitar (olika former, olika typer av papper, olika sätt att kast eller släppa föremålen)
Mät avstånd eller tid Dokumentera med foto eller film samt penna och papper |
Att undersöka med den egna kroppen – leka med naturvetenskapliga begrepp
När det gäller att få syn på naturvetenskapliga begrepp i elevers verb-baserade undersökande tycker jag att begreppet lekkamrat är användbart. Jag bygger då på en studie av en situation där två barn försökte bygga torn av plastmuggar. Tornen rasade flera gånger och barnen fick lov att börja om från början. Tyngdkraften var en lekkamrat i den här situationen eftersom barnen och tyngdkraften samspelade med varandra i tornbygget. Om vi föreställer oss att det inte hade funnits någon tyngdkraft, och alltså ingen risk att tornet rasar, hade det kanske inte varit en särskilt intressant lek för barnen. På samma sätt kan man tänka att elever som åker rutschkana leker med lutningen, tyngdkraften och (den låga) friktionen. Om man återgår till det inledande exemplet med trasorna som fastnade på väggen kan man säga att vattnets absorptionsförmåga är en lekkamrat som gör det till en intressant lek att doppa trasorna i vatten. Därtill är adhesionskraften, som gör att trasan fastnar på väggen, och tyngdkraften, som gör att trasan så småningom faller ner på golvet, lekkamrater som gör det intressant att kasta trasorna på väggen.
Naturvetenskapsverb – lista
Fysikverb
Fysik handlar om studier av energi och energiomvandlingar; kraft och rörelse, ljus och ljud.
- Snurra, rotera, pendla (om rörelser kring en mittpunkt)
- Rulla (om rörelser kring en mittpunkt och i sidled, mot ett underlag)
- Glida, halka (om rörelser där friktionen är låg)
- Falla, rinna (om att röra sig på grund av jordens dragningskraft)
- Välta, balansera (om att saker välter om deras tyngdpunkt är utanför stödytan)
- Studsa (om hur ett föremål återvänder efter att ha stött emot något)
- Fastna (om när saker fäster vid varandra till följd av magnetism eller statisk
- elektricitet)
- Flyta, sjunka (om hur en vätska kan bära ett föremål)
- Flyga, sväva (om hur föremål rör sig och bärs av luften)
- Värma, kyla, isolera (om hur värme leds i olika material)
- Lysa, skugga, spegla (om hur ljusvågor rör sig)
- Låta, eka (om hur ljudvågor rör sig).
Kemiverb
Kemi handlar om hur olika ämnen är uppbyggda, vilka egenskaper de har, hur de förändras och vad som händer när olika ämnen möts.
- Lösa, blanda (om hur ämnen blandar sig med varandra)
- Separera, sila (om hur blandningar delas upp i sina beståndsdelar)
- Absorbera, väta (om hur en vätska sugs upp av ett material)
- Fastna, limma (om hur ämnens ytor hakar i varandra)
- Färga (om hur färgämnen binds till en yta, eller blandas i en vätska)
- Smälta, stelna/frysa, förångas/avdunsta, kondensera (om hur ämnen övergår
- mellan olika faser: fast, flytande och gas)
- Rosta (om hur järnytor förändras i kontakt med fukt och syre).
Biologiverb
Exempelvis sådana som rör olika faser i växters liv:
- Gro, växa, vissna
- Ruttna, förmultna, mögla
Punktlistorna ska läsas som en rad exempel – och inte en fullständig lista – på verb som har med fysik, kemi och biologi att göra. Listorna är snarast tänkta att illustrera ett sätt att urskilja naturvetenskapliga processer, samband och fenomen i världen omkring oss.

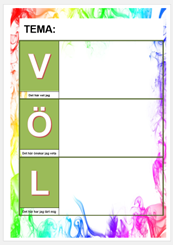 VÖL-diagram är ett enkelt redskap för att fånga upp förförståelse kring ett tema och utvärdera vad man lärt sig.

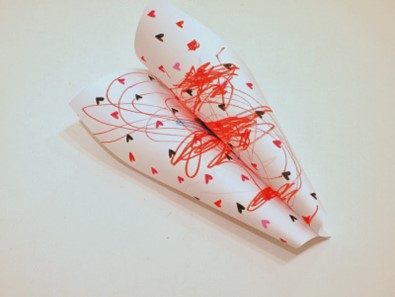
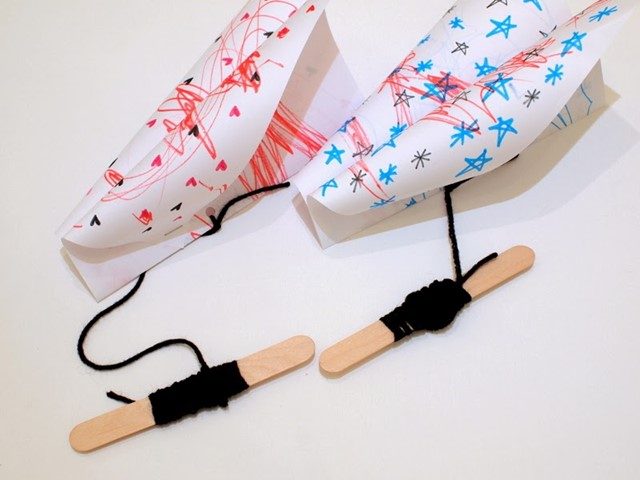 Now you can go out and fly your homemade kite! It takes a strong gust of wind to lift your kite, but if you run around (or ride your bike really fast) your kite will also float next to you.