Foliebåtsutmaning

Foliebåt
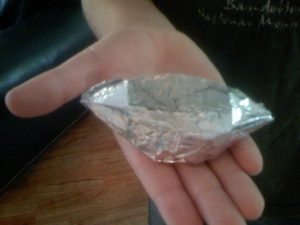
Din utmaning är att bygga en båt som kan rymma så många små mynt som möjligt innan den sjunker.

Du behöver:
• Stor skål med vatten
• 30 plus små mynt per båt
• Aluminiumfolie

Hur du gör ditt flyt-experiment
1. Fyll din skål till 3/4 med vatten.
2. Klipp två rutor aluminiumfolie cirka 20×20 cm för varje barn/grupp. Forma sedan en liten båt från aluminiumfolien av en av dem.
3. Placera 15 mynt på den andra foliefyrkanten (inte båten) och låt barnen skrynkla ihop den med mynten i och lägg den i vattnet. Vad händer? (Den sjunker!)
4. Placera din båt i vattnet och se om den flyter. Forma om den om den inte gör det! Lägg sedan långsamt i mynt en åt gången. Hur många blir det innan den sjunker?

Ta utmaningen vidare genom att försöka bygga om den för att se om den kan hålla ännu fler mynt.

Vetenskapen bakom:

Ni arbetar här med ”Arkimedes princip” – Vattnets lyftkraft är alltid lika stor som tyngden av det vatten som föremålet i vatnnet tränger undan.


Detta experiment kom från LittleBinsLittleHands.

Forms of Expression for Natural Science

Skolverket.seThe Swedish National Agency for Education (Skolverket) has a good article about different ways of communicating about and documenting scientific experiences.

The article gives down-to-earth tips on how to present what you come up with in different ways, for example as a photo book (Book Creator works well for that), or make a blog (maybe try AudioMemos to create and SoundCloud to upload). Or why not do an advertising campaign (maybe use Pupet Pals to make small movies, or iMotion if you want to use green-screen technology). Or maybe even a blog? (Easy to do on Pedanet, or WordPress)

Working with learning through a presentation deepens the thinking about what they have learned and anchors it better in the memory, that you can also connect a little digital technology makes it a more exciting and develops their abilities in the digital field.

I recommend that you take a look at ”Expression forms for Discoverers” on the National Agency for Education’s page. (Note: the article is in Swedish.)

Uttrycksformer för Naturvetenskap

Skolverket.seSvenska Skolverket har en bra artikel kring olika sätt att kommunicera kring och dokumentera naturvetenskapliga upplevelser.

Artikeln ger konkreta tips om hur man kan presentera vad man kommer fram till på olika sätt, exempelvis som fotobok (Book Creator fungerar bra till det), eller gör en blogg (pröva kanske AudioMemos för att skapa och SoundCloud för att lägga upp). Eller varför inte göra en reklamkampanj (använd kanske Pupet Pals för att göra små filmer, eller iMotion om du vill använda green-screen teknik). Eller kanske rentav en blog? (Går lätt att göra på Pedanet, eller WordPress)

Arbetandet med lärandet via en presentation fördjupar tänkandet kring vad de har lärt sig och förankrar det bättre i minnet, att man dessutom kan knyta in lite digital teknik gör det lite mer spännande och utvecklar deras förmågor på det digitala området.

Jag rekommenderar att du tar en titt på ”Uttrycksformer för upptäckare” på Skolverket sida.


Stargazing in the daytime

If you enjoy watching star constellations with the kids, it can be difficult when they are in kindergarten / preschool during the day as it is often bright (unless you live far north want to say).

Then you can take advantage of the SkyView Lite app that shows where the constellations should appear if it was dark. It is displayed on top of the image the camera takes from real sky in what is called augmented reality.

The app can be found here: https://blog.edu.turku.fi/iktpedagogik/2020/07/02/skyview-lite/

Titta på stjärnbilder på dagen

Om du gillar att titta på stjärnbilder med barnen kan det vara svårt då de är på dagis/förskola under dagen då det är ofta är ljust (om du inte bor långt norrut vill säga).

Då kan du utnyttja SkyView Lite-appen som visar var stjärnbilderna borde synas om det var mörkt. Den visas ovanpå bilden som kameran tar från verkliga himlen i så kallad förstärkt verklighet.

Appen hittar du här: https://blog.edu.turku.fi/iktpedagogik/2020/07/02/skyview-lite/

Create Your Own Underwater Vulcanoe

What you need to do your own underwater vulcanoe is (maybe not as good looking as the real Hawaiian below):

  • A large container
  • A glass / small vase / beaker, preferably with a small neck or collar for easier attachment of threads
  • Yarn / string or steel wire
  • Water
  • Food Colour

Tie the cord / steel wire into the collar of the small container. In the large container you pour cold water. In the glass / vase / beaker you pour as hot water as you can (think of the risk of explosion with boiling water in glass!) And color the warm water with the food colour. Immerse the small beaker in the large container and see what happens!

The hot water is lighter than the cold water, and therefore wants up to the surface to lie there. It flows out of the smaller beaker to reach the top of the large container.

Underwater vulcanoe.

Gör din egen undervattensvulkan

Vad du behöver för att göra din egen undervattensvulkan är (kanske inte lika snygg som den riktiga från Hawaii här under):

  • En stor behållare
  • Ett glas/en liten vas/ en bägare, gärna med en liten hals eller krage för att lättare kunna fästa trådar
  • Garn/snöre eller ståltråd
  • Vatten
  • Karamellfärg

Knyt fast snöret/ståltråden i kragen på den lilla behållaren. I den stora behållaren häller ni kallt vatten. I glaset/vasen/bägaren häller ni så varmt vatten ni kan (tänk på explosionsrisken med kokande vatten i glas!) och färga det varma vattnet med karamellfärgen. Sänk ner den lilla bägaren i den stora behållaren och se vad som händer!

Det varma vattnet är lättare än det kalla vattnet, och vill därför upp till ytan för att lägga sig där. Det strömmar upp ur den mindre bägaren för att hamna högst upp i den stora behållaren.

Undervattensvulkan.

Baking soda rocket

Rocket.Now that the weather is getting a little warmer, it can be fun to experiment a bit with water. In this case, build a rocket.

What you need is:

  • Film jar (or similar jar with snap cap)
  • Baking soda
  • Water
Pour 1 teaspoon baking powder into the film jar. Fill up to about half the jar with water.
Quickly snap on the lid, shake once, set it upside down and take a step back.
Explanation
Baking powder consists of about 30% bicarbonate, 40% some acid (eg sodium pyrophosphate) and 30% moisture resistant substance (eg corn starch). The baking powder reacts with itself when it comes into contact with water – bicarbonate and acid react to form a salt (which depends on the acid) as well as carbon dioxide.
The carbon dioxide is in gaseous form, which means it takes up a lot of space. The more carbon dioxide that is formed, the more pressure inside the film can increase (this high pressure is due to the fact that the carbon dioxide molecules are forced on a small volume while they collide a lot with each other and the film can walls). When the pressure becomes sufficiently large, the carbon dioxide molecules shoot out of the film can, while the lid flies off and the film can lift.

Experiment
To make this study an experiment, try answering one of the following
issues. Don’t forget to make a hypothesis and explain the result.
 Will the rocket become more powerful if you use hot water?
 Will the rocket become more powerful if you use more water?
 Will the rocket become more powerful if you use more baking powder?
 Will the rocket become more powerful if you use a larger jar with a lid, as well as more water and baking powder?

Variants

  • It is possible to make a launch pad by attaching an empty towel roll to a rigid paper, and then placing the film can in the towel roll.
  • It is also possible to mix baking powder and water in a tightly sealed bag and see how the bag expands (and possibly cracks).
  • Instead of baking powder, you can use some type of effervescent tablet, e.g. Samarin or a vitamin C tablet. These also usually contain bicarbonate and some acid.
  • Even more powerful is the reaction if you pour vinegar into water instead of water.

Thank you to the Experiment Café in Sigtuna for this experiment.

Bakpulver-raket

Raket.Nu när vädret börjar bli lite varmare kan det var kul att experimentera lite med vatten. I det här fallet bygga en raket.

Vad du behöver är:

  • Filmburk (eller liknande burk med snäpplock)
  • Bakpulver
  • Vatten

Häll 1 tsk bakpulver i filmburken. Fyll upp till ungefär halva burken med vatten.
Knäpp snabbt på locket, ska filmburken en gång, ställ den upp och ner och ta ett steg tillbaka.

Förklaring

Bakpulver består av cirka 30 % bikarbonat, 40 % någon syra (t.ex. natriumpyrofosfat) samt 30 % fuktmotståndigt ämne (t.ex. majsstärkelse). Bakpulvret reagerar med sig självt när det kommer i kontakt med vatten – bikarbonat och syra reagerar och bildar ett salt (vilket beror på syran) samt
koldioxid.

Koldioxiden är i gasform, vilket innebär att den tar upp stor plats. Ju mer koldioxid som bildas ju mer ökar trycket inne i filmburken (detta höga tryck beror på att koldioxidmolekylerna trängs på en liten volym samtidigt som de kolliderar mycket med varandra och filmburkens väggar). När trycket blir tillräckligt stort skjuter koldioxidmolekylerna ut från filmburken, samtidigt som locket flyger av och filmburken lyfter.

Experimentera

För att göra denna undersökning till ett experiment kan du försöka besvara någon av nedanstående
frågor. Glöm inte att ställa en hypotes och att förklara resultatet.
 Blir raketen kraftigare om du använder varmt vatten?
 Blir raketen kraftigare om du använder mer vatten?
 Blir raketen kraftigare om du använder mer bakpulver?
 Blir raketen kraftigare om du använder en större burk med lock, samt mer vatten och bakpulver?

Varianter

  • Det går att göra en uppskjutningsramp genom att tejpa fast en tom toarulle på ett styvt papper, och sedan placera filmburken i toarullen.
  • Det går även att blanda bakpulver och vatten i en tättomslutande påse och se hur påsen utvidgas (och eventuellt spricker).
  • I stället för bakpulver går det att använda någon typ av brustablett, t.ex. Samarin eller en C-vitamintablett. Även dessa innehåller oftast bikarbonat och någon syra.
  • Ännu kraftigare blir reaktionen om du i stället för vatten häller i ättikssprit.

Tack till Experimentskafferiet i Sigtuna för det här experimentet.

Fun with air

A bit of fun with air, balloons and cotton balls.

  1. Balloon Sneak
    Place a balloon at one end of the room and sneak up against it. 0m the balloon moves out of the air in the room, you must back until the balloon is still standing, before you can start sneaking on it again. Anyone who reaches the balloon may place it in a new place, so you sneak on!
  2.  Where does the air go when you blow?
    Blowing on a spout of paper or cotton shows how the air gets a direction when pressed out of the mouth through the lips. It is possible to control the direction if you train a little, by blowing from different directions and by moving the hole between the lips. It is also possible to control how far between should come by blowing different hard. Just try it out! To further develop the blowing, you can use straws of various kinds, thin and thick, those that can be angled and those that are straight and the nice squeaky straws can not be forgotten!
    For the more competitive, there are many variants to try. For starters, you can have each to blow and blow one blow each and see who comes closest to the center! A further development of this is to see how many blows each person needs to reach the midpoint. Then you should have decided from the beginning what is the matter, is it a matter of coping with as few blows as possible, or is it about blowing as gently as you can, and thereby getting many blows? Of course, you can also compete by blowing towards the other’s tussle to prevent it from reaching the nest. Admittedly, it becomes more blow hockey than curling, but it’s also fun! If you want to play blow hockey, the thick straws that are led and can bend like a hockey club are usually best. Small targets can be made by placing two stones at a certain distance from each other.