Exploring the 5 senses
YOU WILL NEED:
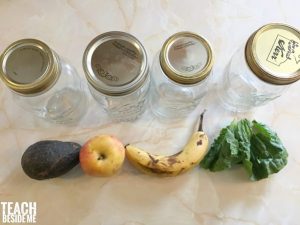
- Apple Varieties {5 is a good number!}
- Knife {adults only for cutting apple slices}
- Paper Plates
- Marker
- Printable Science Sheet
- Your Senses!
HOW TO SET UP A TASTE TEST EXPERIMENT
- Choose your apple types and place each one on a paper plate.
- Label the plate with the apple’s name.
- Then an adult should use a knife to cut out wedges of apple for everyone.
- Time to observe how each apple tastes, smells, feels, and crunches!
LEARN ABOUT THE BODY’S 5 SENSES
This is the perfect opportunity to talk about the body’s five senses!
TOUCH | TASTE | SOUND | SIGHT | SMELL
Get everyone talking about how each apple tastes, smells, feels, and crunches!
Describe what the apple looks like with your sense of sight. What color is the skin? What color is the flesh? What shape is it? Compare the apple colors and sizes.
Describe what the apple feels like with your sense of touch. What does it feel like? Does it feel wet or dry? Smooth or rough? Soft or hard?
Describe what the apple smells like with your sense of smell. Compare the smell of the different apples.
Then on to the best bit… taste testing each apple! Describe what the apple tastes like with your sense of taste, and what it sounds like with your sense of sound. Close your eyes when you are taste testing and see if that makes a difference observing.