Practicing Number Sequence Skills With Your Body

  • Half of the pupils stand in a line in the yard or in the gymnasium and create a series of different body positions.
  • The other half of the students continue the line by creating a new, similar series.
  • The task can be made more difficult by asking about the length of the series or by asking participants to create a series that has a certain length.

Idea from Lumatikka’s material.

The wall is in the way

Are you keeping your balance?

Step 1: Stand with your side against the wall, with one shoulder and your foot close to the wall.

Step 2: Now try to lift the other foot, i.e. the one that is not close to the wall.

What happened?

It is impossible to lift the foot without falling. The foot that is close to the wall cannot have all the force and mass on it without changing position. You will notice this if you stand freely and lift one leg. Your centre of gravity changes. When you stand against the wall and try to shift your centre of gravity, the wall won’t let you do it. It is in the way of a change of centre of gravity that makes you stand a little crooked.

Your centre of gravity is determined by the shape of your body and by its mass. When standing upright, a person’s centre of gravity is somewhere in the middle of the stomach. You can maintain your balance with all your body parts as well as your arms and legs, by moving them. You need a support surface, such as your feet when standing upright (or on your hands if you are standing on your hands), to keep your balance. The vertical projection of the centre of gravity (i.e. the place above which the centre of gravity is located) should be inside the support surface in order to keep your balance (or somewhere between the support surfaces if there are several of them, e.g. when standing on two legs).

Idea from Heurekas Experimentfabrik

Puddle Scientist

6 ways to complete an in-depth puddle investigation-

  1. How deep is the puddle?
  • March right in and measure with your feet/legs/boots
  • Use a nature measuring stick (learn how to easily make your own)
  • Use conventional measurement tools like rulers, metric sticks
  • Record your results
  1. How big is the puddle?
  • Use a ruler, yard stick or metric stick to measure the length of your puddle
  • Use a long string to form an outline of the puddle and then measure it to find the circumference of your puddle
  • Record you results.
    It is fun to track the differences in the puddle stats over time so keep a record of daily or hourly changes.
  1. What shape is the puddle?
  • If your puddle is on a hard surface like a sidewalk or driveway you can draw around the puddle with chalk, but if your puddle is in dirt or mud, use a stick to draw around the shape of the puddle
  • Look at your puddle from above, from beside and from inside the puddle
  • Draw the shape of your puddle in your journal
  • Use words to describe your puddle’s shape
    Keep checking & drawing your puddle shape. Does the shape change over time? What does it look like when water is gone? Will a puddle form here again?
  1. Who uses the puddle?
  • Predict what critters might use your puddle
  • What would they use the puddle for? (drinking, bathing, splashing fun?)
  • Keep an observation guide to record which critters were in or near the puddle and how they were using the puddle
  1. Does the puddle have a current?
    Make a boat from bark, nuts & other natural materials, create a foil boat or make one from recycled plastic
  • Sail your boat in the puddle
  • Can you get it to sail from one side of the puddle to the other?
  • Observe the natural boat movements (without humans touching the sailboat)
  • What forces make the boat move?
  1. Problem Solving: How can you get water out of the puddle?
    Let learners brainstorm and figure out a way to get the water out of the puddle-
  • Have some materials handy in case learners need it for their plan (sponges, cups, pipettes & a variety of materials for exploration)
  • Rubber boots and stomping is a really fun way to get the water out!

Nature-based Stick Rulers

  1. Find a nice straight stick (a straight stick is best for measuring)
  2. Line up your stick next to your ruler and use clippers to cut the stick 12 inches long
  3. Add lines at each of the inch (and if you would like half inch) marks with a permanent marker or by carving notches into it using a ruler as a guide

Get your child excited about measuring!

Take your child on a hike with their new ruler stick and let them stop and measure things along the way (build those math skills!). Perhaps even add some literacy to their hike by bringing a notebook and recording all their measurements.

Idéa taken from Puddle Scientist — Learning withOutdoors

Clapping math

1a) Own numberrythms

  • Divide into groups. Each group is assigned a different number (3, 4, 5 or 6).
  • The groups are tasked with planning their own clapping series based on their numbers. The group’s number indicates how many claps the series should consist of, but the claps may hit the thigh, abdomen, head, etc. in any order. The only rule is that the last clapping should be a regular clapping with your hands.
  • The members of each group practice clapping through their series smoothly one after the other. For example, the members of group 5 should clap like this: 1-2-3-4-5-1-2-3-4-5-1-2-3-4-5, etc. Make sure that there is no break between fifth and first clap and that the clapping rhythm continues without interruption. Practice should be carried out until all groups know their clapping series by heart and can complete it without interruption.

1b) Ready-made rhythms (alternative arrangement)

  • If the time reserved for the task is limited, you can simply skip the part where the groups come up with their own clapping series. Instead, ready-made series can be used.
  • 3 pats: thigh – thigh – hands
  • 5 pats: thigh – thigh – chest – ribcage – hands
  • Students get to practice both series.
  • The class is divided into two groups: one prepares to perform the series of three clapping, the other the series of five clapping.

2) Clap together

  • Two groups are selected, for example groups 3 and 5. The groups must carry out their clapping series at the same time. Both groups should start clapping at the same time and stick to the same pace.
  • What kind of rhythm is formed by the clapping of the groups? Does the last clapping of hands occur at the same time or at different times in different groups? It may be noted that the last clap often occur at different times, but sometimes they occur at the same time.
  • After how many claps do the last claps with the hands occur again at the same time? The teacher can help and call out the first clapping (immediately after the first simultaneous clapping). Everyone counts together and concludes that the correct answer is 15, which is the lowest common multiple for the numbers 3 and 5.
  • Try two other groups. What numbers do you come up with as the lowest common multiples for these two numbers? Which rhythm sounds the most fun? What happens if three or four groups clap at the same time?

3) Draw the rhythms

  • Start by drawing 15 horizontal lines next to each other on the board. Ask group 3 to come up to the board and draw a tower above every third line. When they are finished, ask group 5 to draw a slightly taller tower above every fifth line.

  • At which line do the towers first appear above the same line? (Group 5 can also draw their towers behind the towers of Group 3.)
  • Try clapping the rhythms using the picture created on the board.
  • Is it easier now?
  • Draw out other rhythms in the same way.


The idea is taken from Lumatikka’s material.

Water Drop Painting

SUPPLIES:

  • Art Paper
  • Watercolor paints
  • Water
  • Brush
  • Dropper

INSTRUCTIONS:

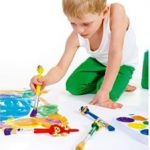
  • STEP 1: Use the dropper to place water drops around your paper in any design you like.
  • STEP 2: Use your paintbrush to GENTLY color each drop by filling your brush with color and then gently touching the top of each drop.

You don’t want to break the drops and spread water all over the page!

Watch what happens to the water drops.

The drop will magically change color as if you were using a magic wand! Repeat with different colors!

HOW DOES IT WORK?

Surface tension and cohesion are the reason you can form bubbles of water on your paper. Cohesion is the “stickiness” of like molecules to one another. Water molecules love to stick together! Surface tension is the result of all the water molecules sticking together.

When you place the small drop gently on the paper, a dome shape begins to form. This is due to the surface tension forming a shape that has the least amount of surface area possible (like bubbles)!

Now, when you add more (your colored water) water to the drop, the color will fill the entire drop that was already there. Don’t add too much though, or your ‘bubble’ will pop!

Make Your Own Paper Kite

Materials:

  • Printing paper
  • Scissors
  • Yarn (This worked well for me, but I wish I had used a lighter string.)
  • Tape
  • Popsicle stick
  • Markers
  • Hole punch
  • Stapler
  • Ruler

Instructions

  1. Draw a pattern on both sides of the paper.
  2. Fold the paper in half. (Half the length.)
  3. Using your ruler, make a mark at 6.5 cm and a mark at 9 cm on the folded edge.
  4. Now bend both corners of your paper downwards and staple them together at the 6.5 cm mark. (Don’t fold them down, make sure the paper is curved.) Your kite should now look like this.
  5. Punch a hole at the 9 cm mark. Then cut a long piece of string and tie it to your kite.
  6. Tape the other end of your string to a popsicle stick. Wrap your excess string around the popsicle stick so it doesn’t tangle.

Now you can go out and fly your homemade kite!    It takes a strong gust of wind to lift your kite, but if you run around (or ride your bike really fast) your kite will also float next to you.

Toy Car Friction Experiment

Simple physics activities like this toy car friction experiment are a wonderful way to get kids thinking, exploring, problem solving, and observing what is happening around them.

All you need are some simple ramps, textured materials, and toy cars, and you are ready to go.

Extend the activity by applying the scientific method: get the kids to make predictions about which surface will be faster or slower, measure it with a stopwatch and make conclusions.

Tips For Exploring Ramps (Incline Planes)

Allow the kids to explore the bare ramp as they wish. They are going to be super excited to play that it is often best to let them explore the activity freely for a bit first.

You can also test out angles at this point. Change the position of the ramp and test out which ramp angles are faster or slower.

Which toy cars move faster? Heavier, lighter, longer, or shorter cars move at different speeds. This is a great way to get them thinking about the way things move.

Note: You may want to split this activity into two learning times since exploring the ramps or inclined planes is great fun and is a physics lesson in itself.

When the kids are ready, move on to your textured ramps. Let the kids feel the textures and describe them to you. This is a great time to introduce the term friction if you would like.

What Is Friction?

Friction is the resistance an object meets when moving over another surface. The materials you attached to the ramps changed the surface of the ramp. The different cars will experience different amounts of friction when going down these ramps causing the cars to speed up or slow down.

Toy Car Friction Experiment

Supplies:

  • Materials to make ramps. You can use cardboard or wood planks.
  • Toy cars
  • Variety of textured materials to create friction. Hand towels, sandpaper, rubber grippy mats, tin foil, parchment paper, a piece of rug, or even dirt.
  • Tape to secure materials if necessary so they do not slip off the ramps.
  • Stopwatch and measuring tape. These are optional but a fun way to extend the activity and encourage making predictions.

Instructions:

  1. Choose the number and type of materials you want to test, and how many ramps you want to have available.
  2. Leave one ramp free of materials as a test ramp. Secure your materials to the other ramps as needed.
  3. Set up your ramps on an incline from same height. We used stairs, but you can also stack books.
  4. Gather your cars and kids.

Ask lots of questions. Before they test out the cars, have the kids guess which texture might slow down the car or speed it up as it goes down the ramp. Make predictions on which cars will go faster or slower.

Let the kids race cars down the different ramps. If appropriate, you can use a measuring tape to see how far the cars travel off the ramp.

Which car goes the farthest? Which car is the slowest? Which car crashes, falls off the ramp, or doesn’t make it to the end?

Experiment found from LittleBinSForLittleHands

Create a QR Map

Use a regular wall map to display digital photos, perhaps photos of where the children live, their rooms or the like.

The procedure will then be:

  1. Get a wall map.
  2. Send home an iPad, or similar with the children and let them (or the guardians) take photos of the house they live in, their room, a stuffed animal or the like.
  3. Save your pictures to OneDrive.
  4. Create a link to each image.
  5. Create QR code, for example on QRcodeMonkey.
  6. Put a needle where the child lives and pull a thread from there to the QR code.


The result could be something like this:

(The QR code shows where my desktop is located.)

Make Shadows with Your Body

Supplies

  • Your body
  • A sunny outdoor day
  • Flashlights if you can’t get outside.

Options:

1.Shadow Games

You can play fun shadow games by calling out different shapes, letters, or numbers and inviting the kids to do their best to create them in shadow.

Or call out movements like standing on one foot, reaching up high to touch the sky, and walking on all fours. Also, choose kids to lead the activity and come up with ideas!

2. Music

Dancing around with your shadow is also fun.

We incorporated one of our favorite silly songs into our shadow play, which made the shadow movements extra funny. Sing the song: Head, Shoulders, Knees, and Toes to get your kids moving and examining their shadows.

3. Drawing Shadows

Take a few pictures of the shadows they made for the kids to look at afterward. Then invite the kids to draw a picture of themselves with their shadows.

Alternatively, grab some sidewalk chalk and pair up if you have the space. Outline your partner’s shadow and then swap places.

If you want to make some observations about shadows and daylight, draw outlines at different times of the day!


The idea is copied from Shadow Activities For Preschoolers – Little Bins for Little Hands