On November 23 every year is it Fibonacci Day. It’s named after an Italian mathematician in the 13th century.
He’s known for many things, but I’ll give you two them.
The Fibonacci sequence
Put simply, the Fibonacci sequence is a series of numbers which begins with 0 and 1. Each number after that is equal to adding the two numbers right before it together. For example, 0+1=1 and 3+5=8 … This gives you a sequence that looks like 1, 1, 2, 3, 5, 8, 13, 21, 34, 55 etc.
Any child who has beginning understanding of addition can get a grip of this sequence.
What makes this sequence so interesting?
Fibonacci numbers can be found in the natural world all around us. Most flowers, for example, will have a number of petals which correspond with the Fibonacci sequence. Irises have three petals whereas wild roses and buttercups have five petals. That is of course, until a petal falls off. No wonder rare four-leaf clovers are seen as lucky!
If you cut into a piece of fruit, you’re likely to find a Fibonacci number there as well, in how the sections of seeds are arranged. Bananas have three sections whilst apples have five.
The Fibonacci sequence even plays a role in the subtle spirals you can see in the seed head of a sunflower.
The Golden Spiral –
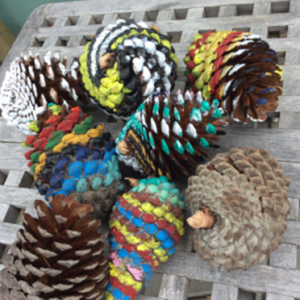
Painting the pinecone spiral
Idea taken from the Smart Happy Project
Step One.
Collect your pinecones. Go outdoors. Observe the nature and search under trees and in bushes to find your specimens.
Brush off any leaves and mud. Sometimes they will be quite damp depending on where you are. I don’t really worry about this too much. This is about the immediacy of a natural item becoming art.
Step Two.
Look for the pattern in the pinecone shape.
NOTE: The scales that make up the outline of the pinecone hide the seeds or the pollen under them. If your pinecone has opened it has released this already. If it is tightly packed, then it has still to release. You can use pinecones at either stage.
The scales are arranged in a pattern as they grow out from the central axis. The angle that they sit at to each other tends to be because of efficiency of space. (This is the angle that is referred to as Fibonacci or Golden angle).
We are encouraging our eye to pick out the spiralling line that neighbouring scales create around the shape of the cone. It sounds more complicated than it is.
Step Three
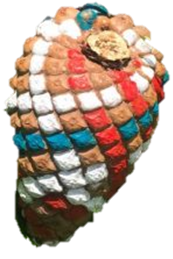
Use one paint colour and paint each scale in the curving line creating a solid spiral that wraps around the pinecone. Any poster or acrylic colour paint will do, just not to drippy as you need to turn the cone in your hand as you work.
I suggest keeping to one colour per line to start with to emphasise the pinecone spiral shape.
You can carry on creating stripes or using different colours as you wish. Sometimes less is more.
Interconnected Spirals
Each cone will have one type of spiral that turns one way (duplicated several times) and another shape of spiral that curves the other direction (again duplicated several times) This is what is known as the interconnected spirals in nature.
After painting your first pinecone spiral line, you can observe the opposite turning spiral and paint that in too, making the interconnected pattern where the two spirals cross over each other. One ‘scale’ will be shared by both spirals so you will need to decide which colour that one is.

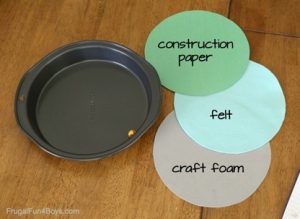
 Supplies Needed