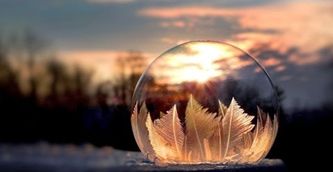
The only thing needed is a bowl of soap water, a straw and a little patience. Then you can blow beautiful frozen soap bubbles that give unique pictures.
Perfect frozen bubbles with secret ingredients
You can either use the ready mixture in the soap bubble containers that you buy in the toy store, or you can make your own blend based on the following recipe:
- 35 ml detergent
- 35 ml of glycerin
- 2 ml of sugar
- 200 ml hot water
Glycerin makes the bubbles thicker, and the sugar causes the surface to get the beautiful crystals. Then to the problem of how to freeze the bubbles so that they can later be photographed.
For best results, the temperature should preferably be below or below 6 degrees Celsius. It is possible to freeze bubbles even in milder weather, but it is more difficult and takes longer.
It is also best to perform the experiment when it is windless so that the bubbles do not burst or blow away before they land and can freeze.
How to Shoot the Bubbles:
- Select a location where it falls in a lot of light and there is a nice background. It may be good to have a cold surface, eg. a snow or ice-covered garden table that you can blow in the bubbles from up close. Otherwise you risk freezing in the air and bursting when they land.
- Set the camera so that the focus point is approximately where the bubble will land. Put the camera on a tripod so you have your hands free to blow bubbles.
- Dip the straw in the soap mixture and blow a bubble. Blow gently and avoid making the bubble too large. Once the soap bubble has landed, you can adjust the camera’s focus as needed to get the details in focus.
- Shoot! Once you have learned to freeze your bubbles, you can try to make a timelapse video. You could use, among others Lapse It eller Osnap!
