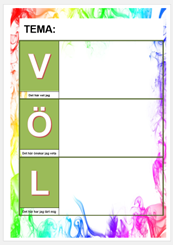
 VÖL-diagram är ett enkelt redskap för att fånga upp förförståelse kring ett tema och utvärdera vad man lärt sig.
VÖL diagram (PDF, 72kB)
Mötespunkt för pedagoger att dela naturvetenskapliga idéer

VÖL-diagram är ett enkelt redskap för att fånga upp förförståelse kring ett tema och utvärdera vad man lärt sig.
VÖL diagram (PDF, 72kB)
Du vill inte bryta dropparna och sprida vatten över hela sidan!
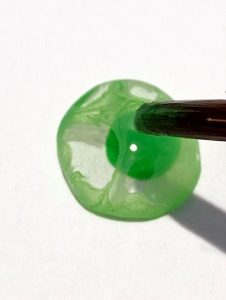
Se vad som händer med vattendropparna.
Droppen kommer magiskt att ändra färg som om du använde en trollstav! Upprepa med olika färger!
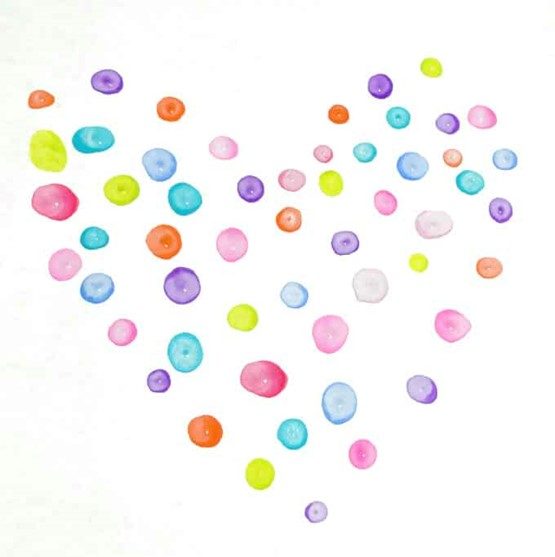
Ytspänning och koherens är anledningen till att du kan bilda bubblor av vatten på ditt papper. Koherensen är ”klibbigheten” hos liknande molekyler till varandra. Vattenmolekyler älskar att hålla ihop! Ytspänning är resultatet av att alla vattenmolekyler klibbar ihop.
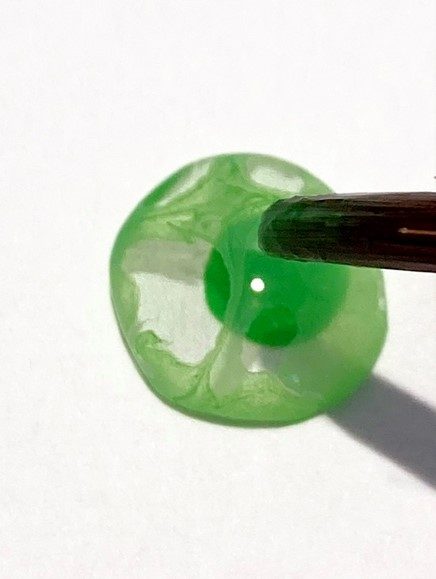
När du placerar den lilla droppen försiktigt på papperet börjar en kupolform bildas. Detta beror på att ytspänningen bildar en form som har minsta möjliga yta (som bubblor)!
Nu, när du lägger till mer (ditt färgade vatten) vatten till droppen, kommer färgen att fylla hela droppen som redan fanns där. Lägg dock inte till för mycket, annars kommer din ”bubbla” att spricka.
You don’t want to break the drops and spread water all over the page!
Watch what happens to the water drops.
The drop will magically change color as if you were using a magic wand! Repeat with different colors!
Surface tension and cohesion are the reason you can form bubbles of water on your paper. Cohesion is the “stickiness” of like molecules to one another. Water molecules love to stick together! Surface tension is the result of all the water molecules sticking together.
When you place the small drop gently on the paper, a dome shape begins to form. This is due to the surface tension forming a shape that has the least amount of surface area possible (like bubbles)!
Now, when you add more (your colored water) water to the drop, the color will fill the entire drop that was already there. Don’t add too much though, or your ‘bubble’ will pop!
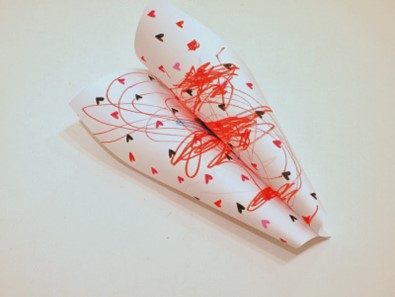
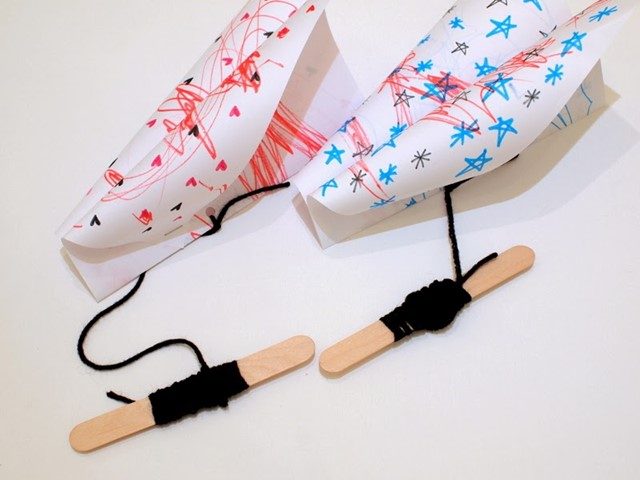 Now you can go out and fly your homemade kite! It takes a strong gust of wind to lift your kite, but if you run around (or ride your bike really fast) your kite will also float next to you.
Nu kan du gå ut och flyga med din egengjorda drake! Det krävs en kraftig vindpust för att lyfta din drake, men om du springer runt (eller cyklar riktigt fort) kommer din drake också att flyta bredvid dig.
Denna utskrivbara aktivitet inkluderar 12 dinosaurier med olika antal prickar på sig och 12 ägg med siffror tryckta på dem.
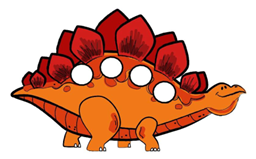
Rada upp dem och passa ihop, spela som memory, eller ha det som ett kort-spel.
Dinosaur Egg Number Matching (PDF, 1MB)
Tipset är hämtat från bloggen Preschool Powol Packets.
This printable activity includes 12 dinosaurs with different numbers of dots on them and 12 eggs with numbers printed on them.
Line them up and connect, play as memory or have at as a card-game.
Dinosaur Egg Number Matching (PDF, 1MB)
The idea is taken from the Preschool Powol Packets blog.
Enkla fysik-aktiviteter som detta friktionsexperiment är ett underbart sätt att få barn att tänka, utforska, lösa problem och observera vad som händer runt dem. Allt du behöver är några enkla ramper, material med olika ytor och leksaksbilar.
Utöka aktiviteten genom att tillämpa den vetenskapliga metoden: låt barnen göra förutsägelser om vilken yta som blir snabbare eller långsammare, mäta den med ett stoppur och dra slutsatser.
Låt barnen utforska den enkla rampen som de vill. De kommer att vara superglada över att spela att det ofta är bäst att låta dem utforska aktiviteten fritt lite först.
Du kan också testa vinklar vid denna tidpunkt. Ändra rampens placering och testa vilka rampvinklar som är snabbare eller långsammare.
Vilka leksaksbilar rör sig snabbare? Tyngre, lättare, längre eller kortare bilar rör sig i olika hastigheter. Detta är ett bra sätt att få dem att tänka på hur saker rör sig.
Du kanske vill dela upp den här aktiviteten i två inlärningstider eftersom det är jättekul att utforska ramperna eller lutande plan och är en fysiklektion i sig.
När barnen är redo, gå vidare till dina olika ramp ytor. Låt barnen känna texturerna och beskriva dem för dig. Det kan vara en bra tid att introducera termen friktion.
Friktion är motståndet ett föremål möter när man rör sig över en annan yta. Materialen du fäste på ramperna ändrade rampens yta. De olika bilarna kommer att uppleva olika mängder friktion när de går ner dessa ramper vilket gör att bilarna påskyndar eller saktar ner.
Ställ massor av frågor. Innan de testar bilarna, låt barnen gissa vilken textur som kan sakta ner bilen eller påskynda den när den går nerför rampen. Gör förutsägelser om vilka bilar som kommer att gå snabbare eller långsammare.
Låt barnen köra bilar nerför de olika ramperna. Om det behövs kan du använda ett måttband för att se hur långt bilarna färdas från rampen.
Vilken bil går längst? Vilken bil är långsammast? Vilken bil kraschar, faller av rampen eller klarar sig inte till slutet?
Simple physics activities like this toy car friction experiment are a wonderful way to get kids thinking, exploring, problem solving, and observing what is happening around them.
All you need are some simple ramps, textured materials, and toy cars, and you are ready to go.
Extend the activity by applying the scientific method: get the kids to make predictions about which surface will be faster or slower, measure it with a stopwatch and make conclusions.
Allow the kids to explore the bare ramp as they wish. They are going to be super excited to play that it is often best to let them explore the activity freely for a bit first.
You can also test out angles at this point. Change the position of the ramp and test out which ramp angles are faster or slower.
Which toy cars move faster? Heavier, lighter, longer, or shorter cars move at different speeds. This is a great way to get them thinking about the way things move.
Note: You may want to split this activity into two learning times since exploring the ramps or inclined planes is great fun and is a physics lesson in itself.
When the kids are ready, move on to your textured ramps. Let the kids feel the textures and describe them to you. This is a great time to introduce the term friction if you would like.
Friction is the resistance an object meets when moving over another surface. The materials you attached to the ramps changed the surface of the ramp. The different cars will experience different amounts of friction when going down these ramps causing the cars to speed up or slow down.
Ask lots of questions. Before they test out the cars, have the kids guess which texture might slow down the car or speed it up as it goes down the ramp. Make predictions on which cars will go faster or slower.
Let the kids race cars down the different ramps. If appropriate, you can use a measuring tape to see how far the cars travel off the ramp.
Which car goes the farthest? Which car is the slowest? Which car crashes, falls off the ramp, or doesn’t make it to the end?
Experiment found from LittleBinSForLittleHands
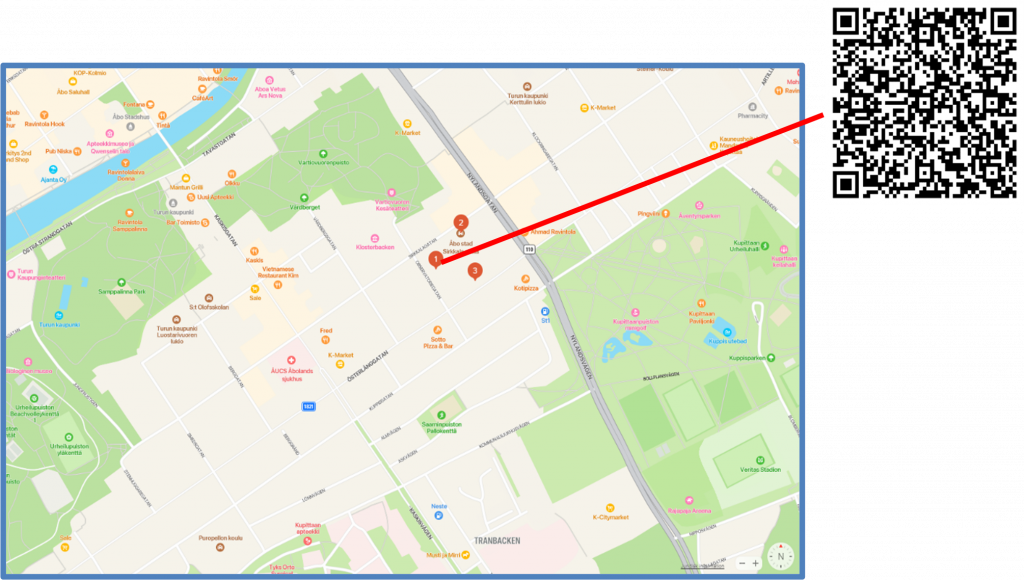
Use a regular wall map to display digital photos, perhaps photos of where the children live, their rooms or the like.
The procedure will then be:
The result could be something like this:
(The QR code shows where my desktop is located.)